


We kick off a lot of projects in classrooms with teachers. Here's what we've learned: the beginning matters more than most people think. The momentum you build in the first few days is what carries students through to the end — or doesn't.
In this example, we’ll follow a museum curation and design project in Social Studies but the approach works across Grades 5 to 8 and most content areas.
There's a version of the research project where students fill in the blanks made by their teacher. Proving that they can move content from one place to another. It looks great during open houses and student-led conferences. There's another version where students really own the project. They develop their own questions and lead with curiosity. It’s messier, slower, and considerably more worth it.
This post is about the second version.
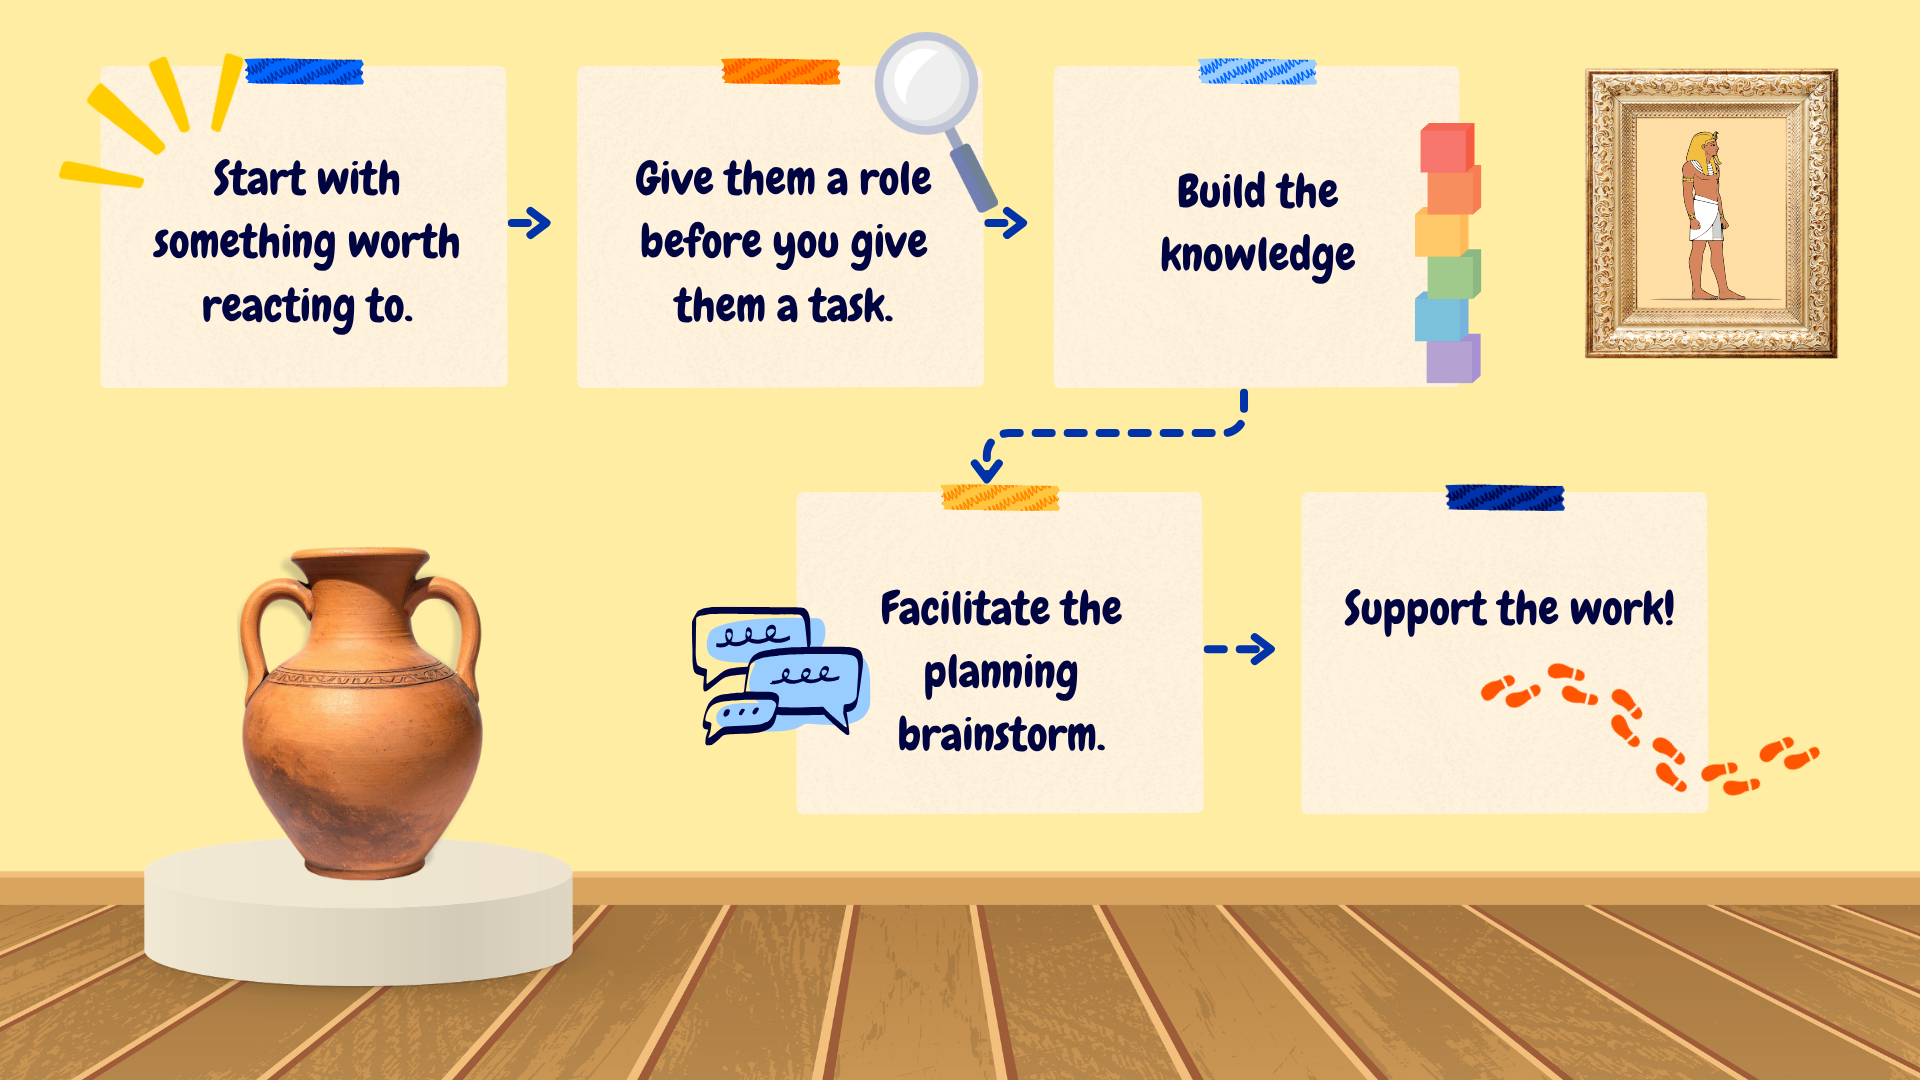
Step 1: Start with something worth reacting to.
Before students can care about a topic, they need a reason to. Your kickoff experience is that reason. It doesn't need to be elaborate, but it needs to create a genuine response in the room.
Good kickoff formats for Social Studies content:
- A short documentary clip or news segment
- A striking primary source photograph
- A physical artifact or replica passed around the room
- A loaded guiding question (What can a single object tell us about the people who made it?)
The goal isn't to introduce the content. It's to create a question that learners will want to answer.
Follow the kickoff with a graphic organizer that externalizes their reaction and has them write it down. Simple prompts work best: What did you notice? What surprised you? What do you want to know?
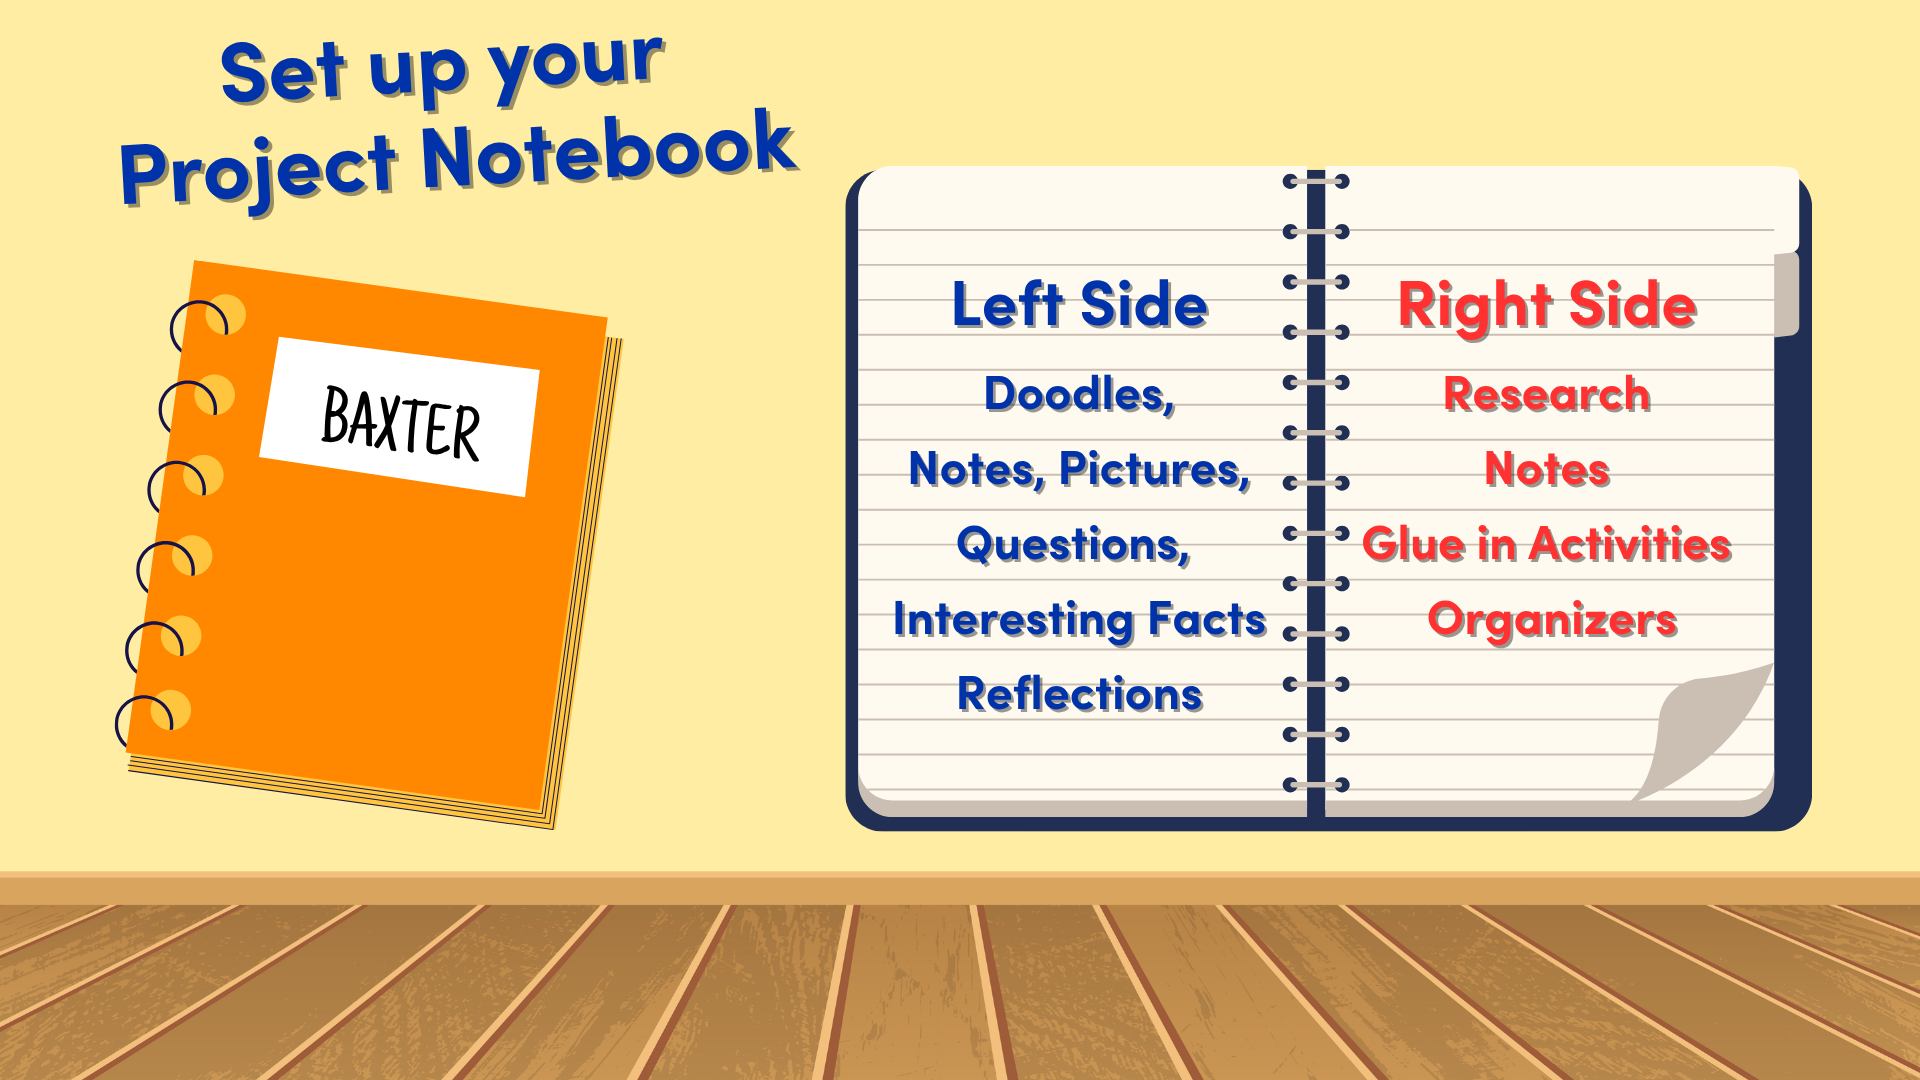
Set up a Learning Journal or Project Notebook at this point too. Students return to it throughout the project to plan, reflect, and track how their thinking shifts. It becomes one of your most useful tools in the later stages.
Step 2: Give them a role before you give them a task.
Teachers assign tasks before students have any sort of relationship to them. That's where a lot of projects go off track. The task becomes something to complete, not something to own.
Flip that sequence. Before you talk about deliverables, ask:
- What is the role of a Museum Curator?
- Makes decisions about what matters and why, considers audience, tells a story through objects and artifacts.
- What is the role of an Exhibit Designer?
- Thinks about how a visitor moves through an experience, what they encounter first, what they're meant to feel or understand.
Expert interviews help introduce the roles.
These aren't just fun labels. They're lenses that work across any Social Studies content area — Indigenous histories, systems of government, historical events, geographic change.
Once their roles have been established, move into what they'll actually be producing. In this case, it's a model of a museum exhibit.
Scaffold the conversation with shared vocabulary:
- Artifact, Exhibit, Perspective, Primary Source, Narrative
And build in structured talk time:
- Think-Pair-Share works well here.
- 3-2-1 Reflection (3 things learned, 2 questions remaining, 1 connection made) helps students process before committing to a direction.
Any notes made go in their Project Journal.
Step 3: Build the knowledge.
This is the part of the project where the teacher does the most visible teaching. Students can't curate what they don't know. Before they can make meaningful decisions about their exhibit, they need a working understanding of the content.
That doesn't mean lecturing for three days and handing them a textbook. It means delivering focused, purposeful mini-lessons that give students just enough to start asking better questions.
What this can look like:
- A short direct instruction segment on a key concept, event, or time period.
- A primary source analysis activity (a photograph, a document, a map).
- A read-aloud or shared reading of an accessible text.
- A guest speaker or short documentary segment with structured viewing notes.
The goal of each mini-lesson isn't coverage. It's curiosity. You're giving students material to think about, not a complete picture to memorize.
Pair each mini-lesson with a structured note-taking scaffold. A simple two-column format (What I learned / Questions I still have) does the job. What matters is that students are processing information, not just receiving it.
Notes go into the Project Journal so the thinking stays connected across the project.
Start whole-class, then move to small groups, then to independent research. Each phase asks a little more of students and a little less of you.
A few structures worth having in your toolkit for this phase:
- KWL charts (Know / Want to know / Learned) to activate and track prior knowledge.
- Source evaluation guides (CRAAP Test, See Think Wonder) to help students distinguish reliable from unreliable information.
- Research question stems (How did... / Why did... / What changed when...) to help students move from facts to inquiry.
This is also when the curator and exhibit designer roles really start to matter. As students gather information, ask them to filter it through their role: Is this something your visitor needs to know? How would you show this to visitors, not just say it? That lens keeps the research purposeful and connected to where the project is going.
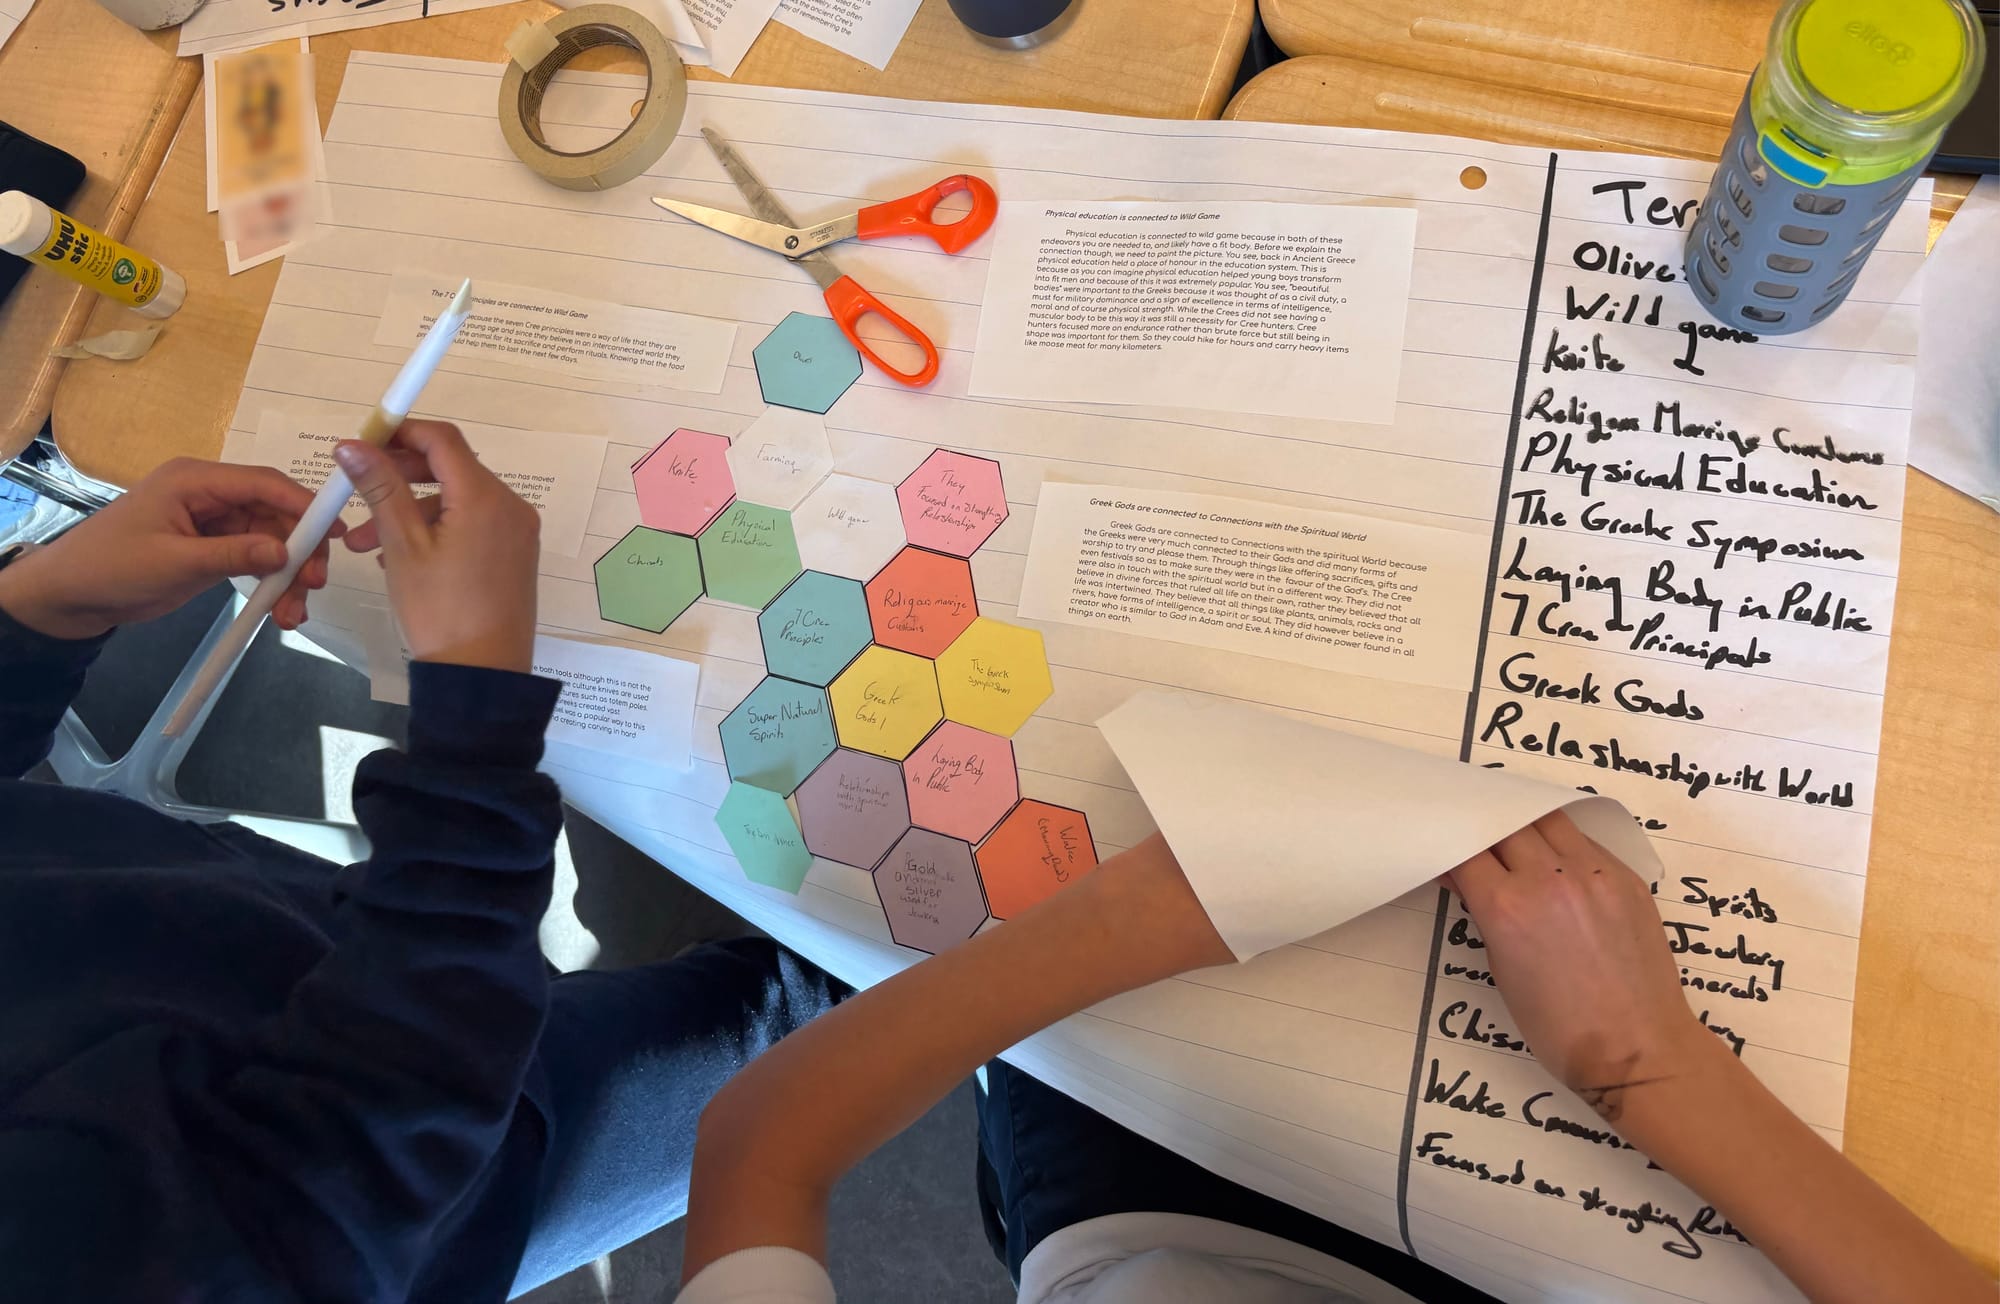
Step 4: Facilitate the planning brainstorm.
This is the hardest part for most teachers, and the most important. Your job is not to direct. It's to move through the room and ask good questions.
Questions that open things up:
- What's the main story your exhibit wants to tell?
- Who is your visitor? How does that affect the way you tell the history?
- What do you want them to leave thinking about?
- How could you incorporate... ?
Offer suggestions as options, not corrections. There's a real difference between Have you thought about it like this? and You should do it this way. One expands thinking; the other narrows it.
Routines that facilitate brainstorming:
- Crazy Eights - A fast sketching exercise that challenges learners to sketch eight distinct ideas in eight minutes.
- Creative Question Starts - A routine to practice developing questions that provoke thinking and inquiry.
The goal at this stage is momentum. Students should leave the brainstorm with real ideas worth pursuing, not a tidy plan handed down from above.
Step 5: Support the work.
Once groups are in execution mode, the path forward won't be a straight line for them or for you. That's fine!
Structure time, not task. A visual project timeline gives students something to orient to without locking them into a rigid sequence. Think of it like bumper bowling: the bumpers keep things on track, but students still have to make their own way down the lane.
What that looks like in practice:
- Embracing ideas from students and modeling curiosity.
- Regular check-ins where groups can renegotiate goals if scope or focus shifts.
- Kanban Boards - A shared visual timeline of project milestones posted in the room.
- Applied Design Thinking - Help structure the phases of their creation.
- Ongoing Project Journal entries to surface thinking and build the habit of reflection as part of the work itself.
Your role during execution is to stay close enough to help and far enough back that students feel the project belongs to them. Reading that balance is some of the most skilled teaching there is.
What you're really building.
A museum exhibit is a good project. But the deeper thing students are practicing — making decisions, owning ideas, adapting when things don't go as planned — that's what carries forward into every research task after this.
Hand the project over early. Stay in the room. Watch what they make.